

Upgrading Windows 11 on Unsupported Hardware: Enabling BitLocker on a ThinkPad with TPM 1.2
With the release of Windows 11, many users are eager to test the latest features, even if their hardware doesn’t meet the official requirements. I recently undertook the challenge of upgrading my old ThinkPad from Windows 10 to Windows 11, despite it being marked as unsupported. The upgrade was surprisingly smooth, revealing a couple of interesting points that I’d like to discuss.
One crucial aspect I noticed post-upgrade was the absence of BitLocker encryption on my C drive. For those unfamiliar with BitLocker, it is a full-disk encryption feature included with Windows that enhances data security by encrypting the entire drive. Its absence means that anyone with physical access to my hard drive can potentially access its content without any restrictions. This lack of encryption could be alarming, especially for users who store sensitive information.
The performance of my laptop feels decent, possibly due to the unencumbered operations without BitLocker’s encryption overhead. However, this raises a pertinent question: Can I enable BitLocker on my C drive with just TPM 1.2, or is the absence of TPM 2.0 a barrier?
Understanding TPM and BitLocker Compatibility
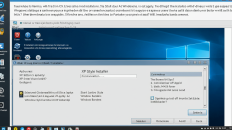
TPM, which stands for Trusted Platform Module, is a hardware-based security feature that helps in securing hardware by integrating cryptographic keys into devices. Windows 11 requires TPM 2.0 for many of its security features, including BitLocker, aiming to provide a more secure computing experience. However, it’s still possible to use BitLocker with TPM 1.2, albeit with some caveats.
To activate BitLocker with TPM 1.2, follow these steps:
- Check for TPM: Ensure your TPM 1.2 is enabled in the BIOS settings of your ThinkPad. This might require a restart and entering the BIOS setup, usually by pressing F1 or another designated key during boot-up.
- Enable BitLocker: Open the Control Panel, navigate to “System and Security,” then choose “BitLocker Drive Encryption.” Select your C drive and click “Turn On BitLocker.”
- Choose Authentication Method: You may be prompted to select how to unlock your drive: with a password or a USB drive. It’s highly recommended to use a strong password for added security.
- Back Up Recovery Key: At this stage, you’ll need to back up your recovery key, which can be saved to a USB drive, printed, or stored in your Microsoft account for future access.
- Encrypt the Drive: Finally, follow the prompts to start the encryption process. It’s worth noting that this may take some time, depending on the size of your hard drive and the amount of data present.
Considerations and Possible Issues
While you can enable BitLocker on TPM 1.2, it’s essential to be aware of potential issues. For instance, some advanced features such as Remote Administration and certain recovery options may not be available. Additionally, there may be performance considerations since TPM 1.2 might not be as efficient as its successor.
In conclusion, while using Windows 11 on unsupported hardware presents several challenges, it is indeed feasible to enable BitLocker on a drive protected by TPM 1.2. This step not only secures your data but also offers peace of mind as we embrace newer technology even on older devices. So, if you’re in a similar situation, consider enabling BitLocker today for enhanced security!
Add comment