
How to Remove Your University’s Name From Windows 11 Pop-Up Notifications
If you’re using Windows 11 and have unlinked your university’s account yet still see its name in pop-up notifications, you’re not alone. Many users encounter this issue, which can be frustrating when you’re trying to fully disengage from an old account. Fortunately, there are several steps you can take to help eliminate these lingering reminders. Below, I’ll guide you through a straightforward process to remove your university’s name from those small pop-ups.
Step 1: Double-check Account Settings
The first step is to ensure that your university account is completely unlinked from your Windows 11 settings. Here’s how to do it:
- Open Settings: Click the Start menu and select the gear icon to open the Settings app.
- Accounts: Go to the “Accounts” section.
- Access Work or School: Select “Access work or school” from the menu.
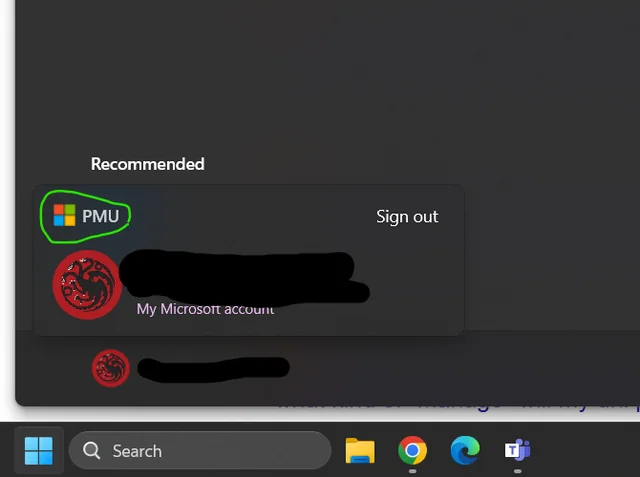
- Remove the Account: Look for your university account. If it’s still visible, click on it, and then choose “Disconnect.” Follow the prompts to complete the process.
Make sure you restart your computer afterward to apply the changes.
Step 2: Sign Out of Microsoft Apps
While you’ve mentioned signing out of Office applications like Word, Excel, and PowerPoint, it’s crucial to ensure that you are also logged out of the Microsoft Store and any background processes that may still tie to your old account:
- Open Office Apps: Launch any Office app (like Word).
- Account Menu: Click on “File” and navigate to “Account.”
- Sign Out: If you see your university email listed under User Information, click “Sign out.”
Repeat this for each Office application.
Step 3: Clear Cached Credentials
Windows sometimes retains cached credentials that can cause your university’s name to still appear. Here’s how to clear those:
- Open Credential Manager: Click on the Start menu, type “Credential Manager,” and hit Enter.
- Windows Credentials: In the Credential Manager, click on “Windows Credentials.”
- Delete Related Entries: Look for any entries related to your university, select them, and choose “Remove.”
Afterward, restart your device to ensure all settings are updated.
Step 4: Check Background Apps
Sometimes apps that remain in the background can show notifications related to your previous accounts:
- Settings: Go back to the Settings app and choose “Apps.”
- Installed Apps: Look for apps that might be associated with your university (like Microsoft OneDrive).
- Stop Background Activity: If you find any related apps, you can choose to uninstall them or change their settings to stop them from running in the background.
Step 5: Update Windows
Lastly, ensuring that your Windows 11 operating system is up to date can fix various bugs and issues, including persistent pop-up notifications.
- Check for Updates: Go to Settings > Windows Update and select “Check for updates.”
- Install Updates: If any updates are available, install them and restart your device.
Conclusion
By following the steps outlined above, you should be able to successfully remove any lingering references to your university’s name from notifications in Windows 11. This process involves unlinking the account, signing out of applications, clearing out cached credentials, checking background apps, and updating your OS. If the problem persists despite these efforts, consider seeking assistance from Microsoft Support or your university’s IT department for further troubleshooting.


Add comment